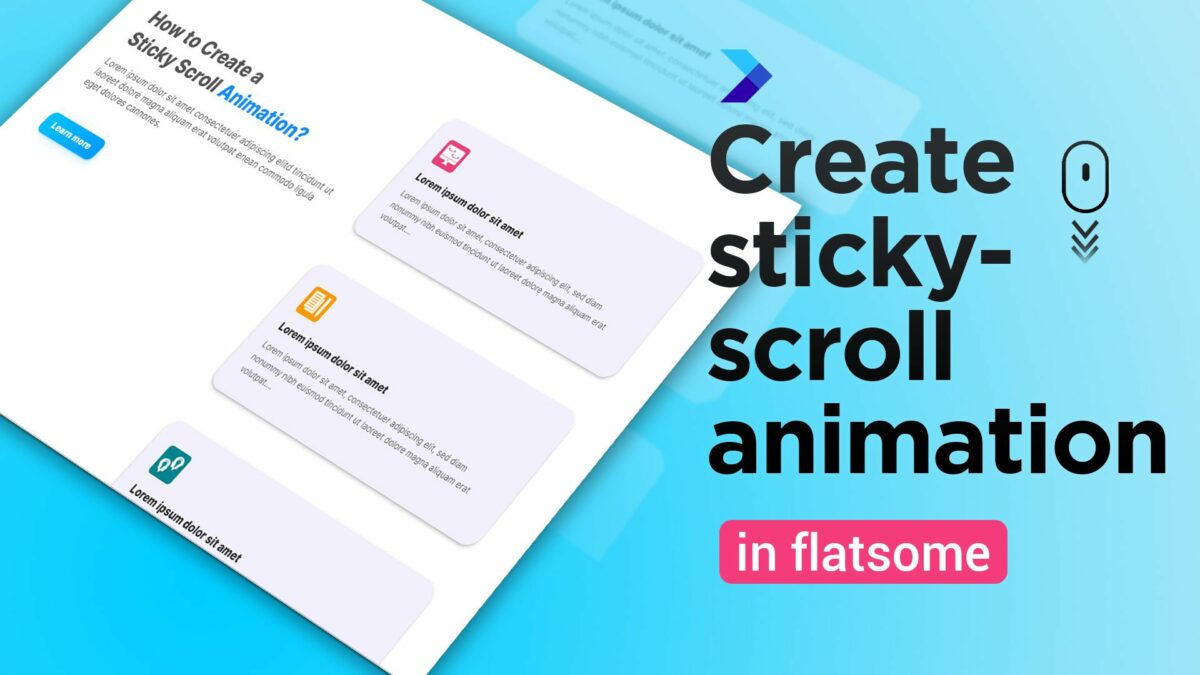
How to create a Sticky Scroll Animation in Flatsome
In this Flatsome Theme Tutorial, you will learn how to create a Sticky Scroll Animation.
Just follow the steps below and create a unique scrolling Effect in Flatsome Theme.
We will follow the steps below:
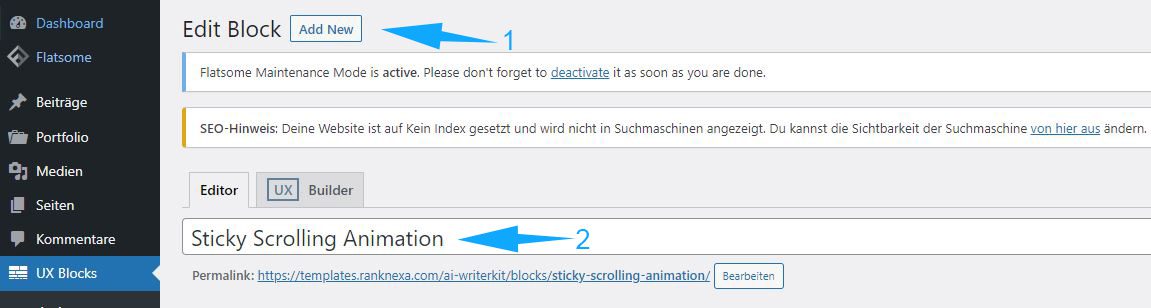
1.Create a new UX Block and give it a name
2.Copy the Shortcode from the UX Block
3.Paste the Block element in the desired place on your page
1. Create a new UX block
First you need to create a new UX block and name it “Sticky Scrolling Animation” or a similar name you like.
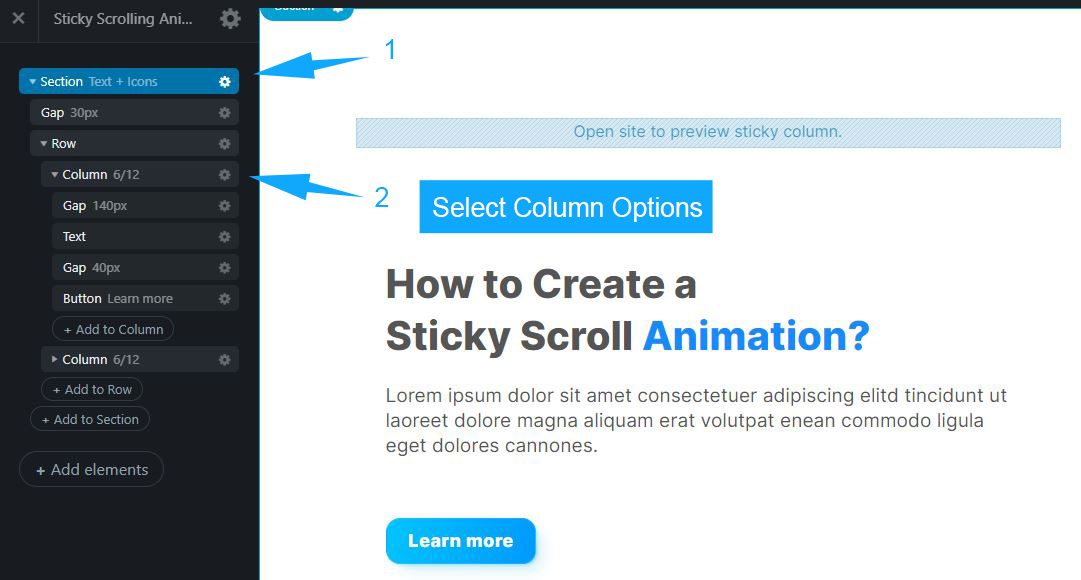
2. Create Section, Row and Column Elements
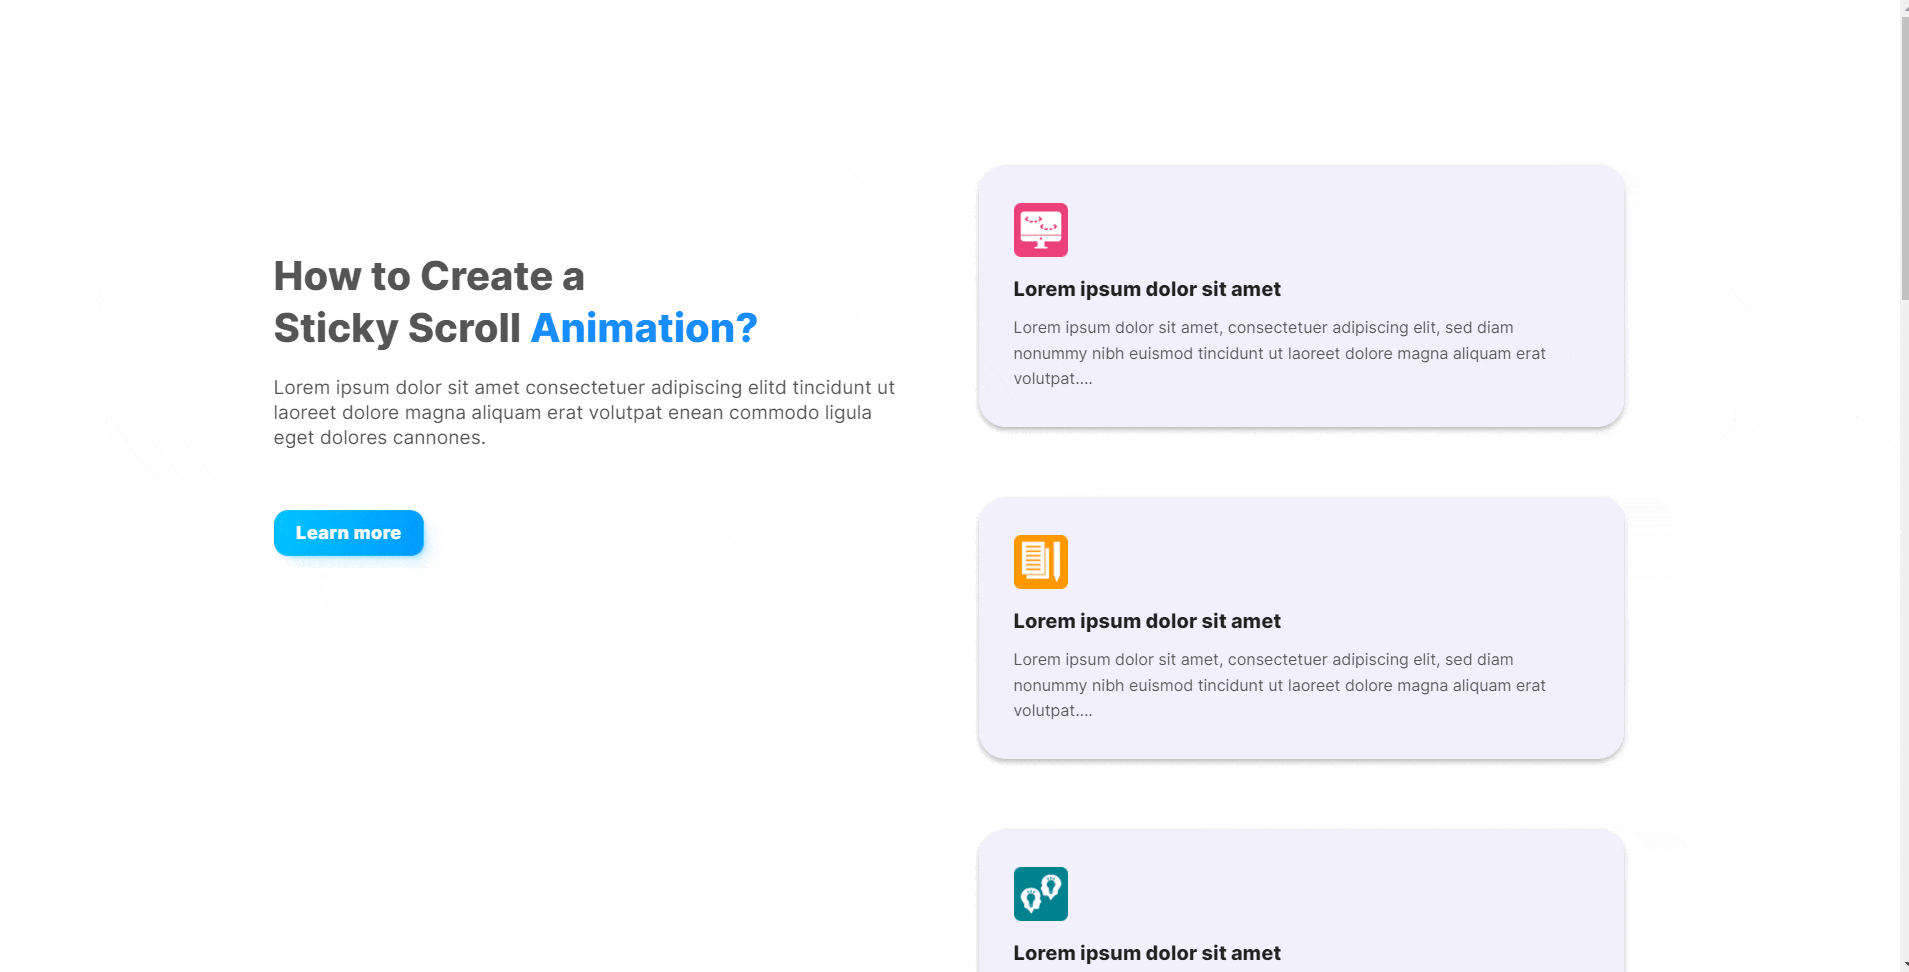
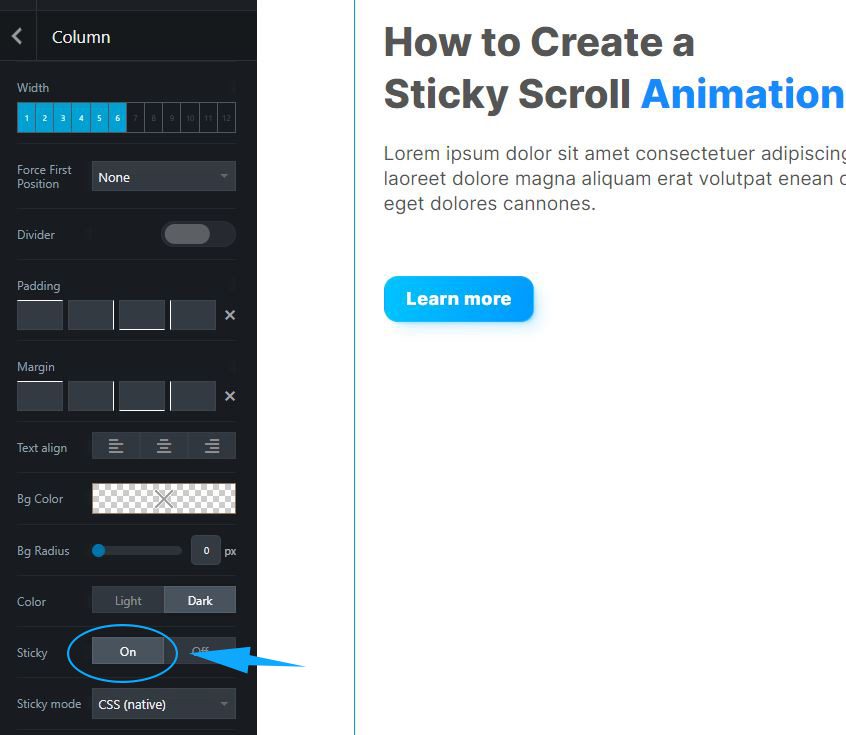
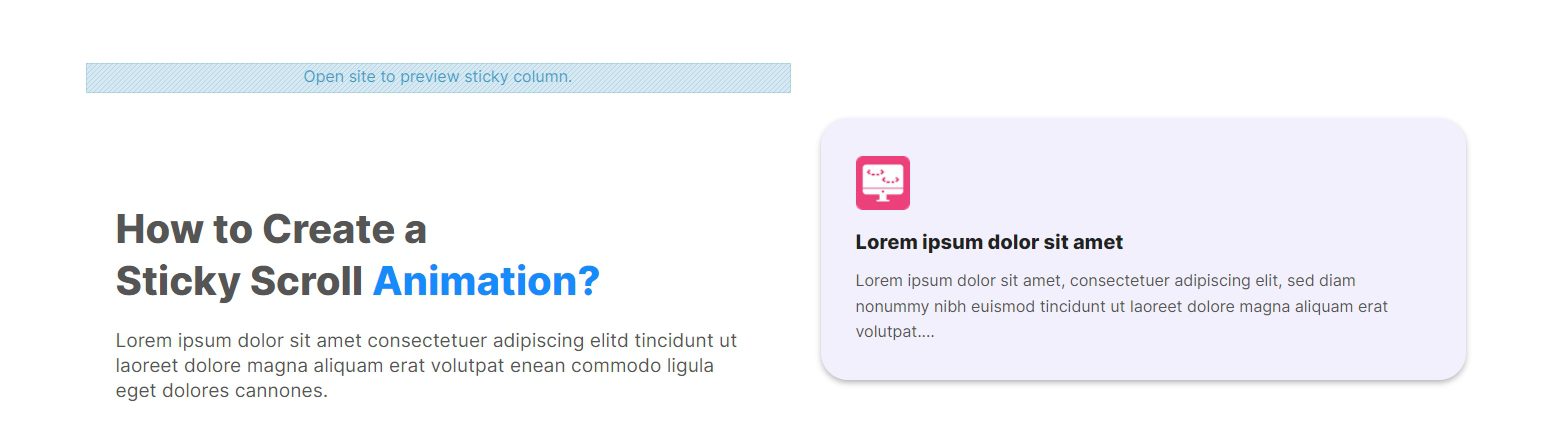
Now we create a Section in the UX Builder. In this Section, first we place a Gap and a Row Element with two Columns in it. In the first column, the fixed part of our animation, we can create any heading with text and button. The next step, we have to make this fixed Column “sticky”. To do this, go to the options menu and enable “Sticky”.
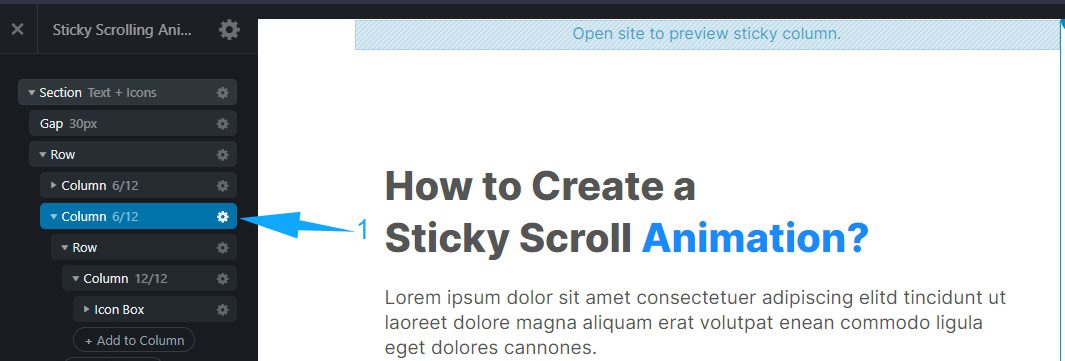
3. Its time to Scroll some Elements now
Now we create the scrollable part. For this we insert a new Row element with another inner Column element in our second Column. After this, we create an icon box in it.
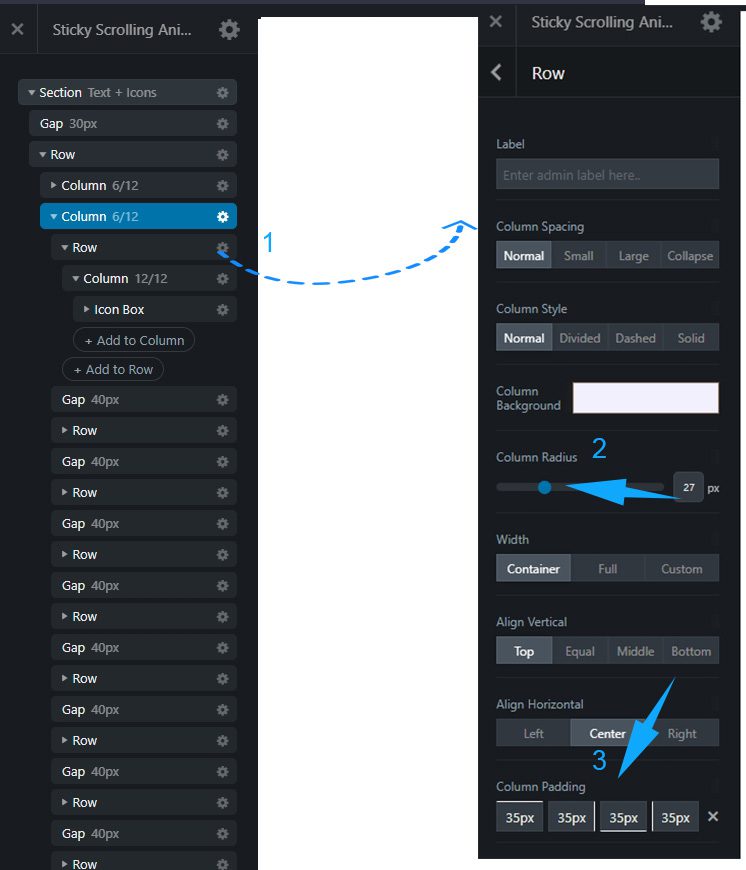
4. Customize the Cards
We now have to give the Card some nice borders and also some padding. Go to the Options menu of the Row. Adjust the Column Radius like in the Picture. Also edit the Column Padding to about 35px.
Note: If you have implemented all the steps correctly, it should now look something like this.
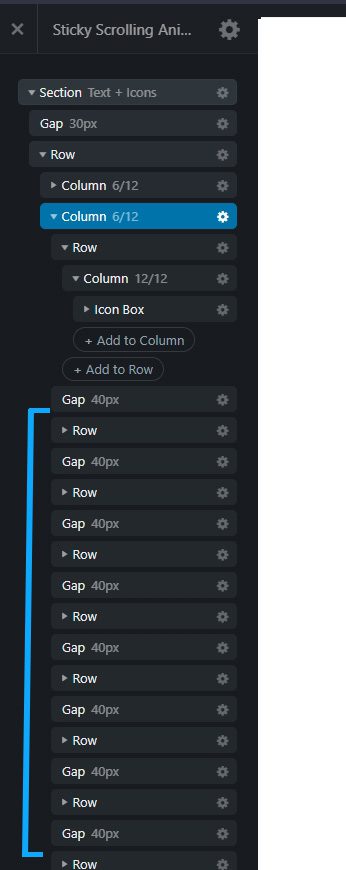
5. Duplicate the Row Elements
To save a lot of time, you can just duplicate your first Row. Also you have to insert a Gap Element between your Rows. You can see on the picture.
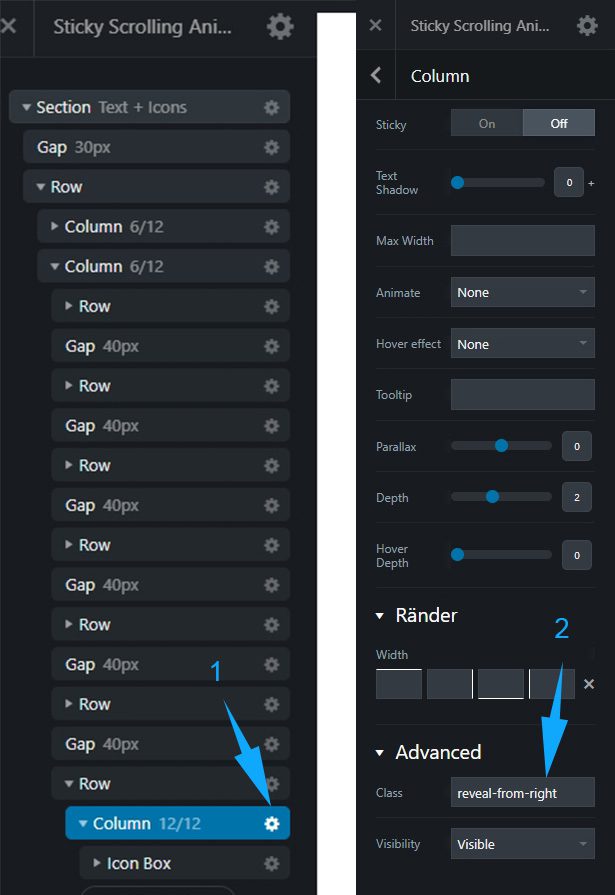
6. Animate your Cards
Now we want the last cards to appear with a fade-in animation from right.
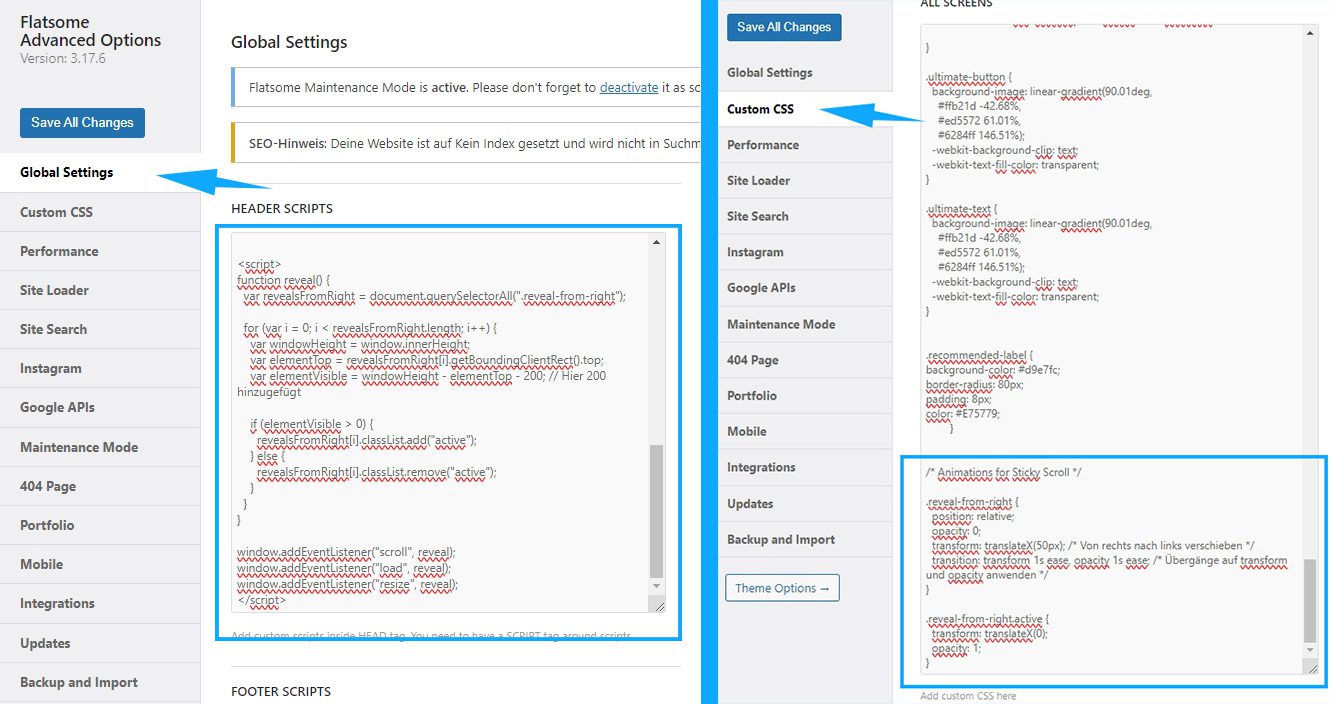
- Copy the Javascript code you can find under this picture. Now open the Flatsome>Advanced menu and in the “Global Settings”, we add the JS code inside the Header area.
- Copy the CSS code you also find under this picture. Now open the “Custom CSS” menu and paste the code in the All Screens Area.
1. CSS Code
You must be logged in to view this content.
2. Javascript Code
You must be logged in to view this content.
In the last step, we have to assign the CSS Class to the Column.
To do this, switch back to the UX Builder and open the options function of the inner column element.
Scroll down and type in “reveal-from-right” in the “Class” field.
Now, after update and save, this card should fade in from right.
You can apply this animation effect to all your cards. That is up to you.